The following tutorial was written by Brooks Garcia. It is a great reference for pollinating Sarracenia flowers. This guide was what I first ran across (posted on Terraforums) a few years ago when I first started to grow Sarracenia and wanted to get into hybridizing. I know that everyone has their own preferences, variation, and methods for pollinating, but I found the below to be a clear and concise guide that helped my Sarracenia addiction really bloom. Thanks Brooks!
***
How to Pollinate a Sarracenia Flower
By Brooks Garcia
This is a rather simple procedure but certain precautions need to be taken to insure that: 1) You are successful and 2) You avoid possible contamination from unwanted pollen. Timing is the key here especially if you want to cross species that typically do not bloom at the same time ( i.e. flava x psittacina). With practice and keen observation you will be able to gauge when a flower needs to be protected and when to transfer the pollen.
Necessary Equipment
* Light weight fabric or tulle/bridal veil netting
* Light weight string
* Thin stakes (if needed)
* Q-tips
* Masking tape
* Sharpie permanent marker
* Scissors
Tools You Need

Flower Structure
We need to discuss the flower structure before hand so you can be familiar with the flower parts and how they function.
Sarracenia in Flower

Sarracenias are designed to prevent self pollination by their very structure. The petals are the colorful parts that attract bees and protect the pollen inside the flower from rain and wind. *The anthers produce the pollen and are in the “roof” of the flower and drop pollen onto the style. The style is the upside-down umbrella that has the 5 stigma (female receptors) and catches the pollen. *The stigmas are the ‘hooks’ or slight protrusions on the points of the style which are outside the flower away from the pollen. A bee lands on the sepals (stiff, petal-like structures), crawls down the petals and enters the flower by crossing over the points on the style between the petals thus getting pollen from a previously visited flower on the stigma. The bee gathers the nectar in the flower getting this flower’s pollen on its body and exits the flower through the “dip” in the style and under the petal thus avoiding getting pollen on the stigmas. Look at a flower closely or pull one apart to understand these dynamics.
Flower Parts

(image courtesy of http://commons.wikimedia.org/wiki/File:Sarracenia_flower_notitles.svg, author: Noah Elhardt)
Step One: Protecting the Flower
You will need to visit a fabric store and buy a tight-knit, light-weight fabric or tulle/ bridal veil netting. Light weight is very important because you don’t want your flower stalk bending under the weight of wet material after a rain. Staking the flower stalk is an option as well on weak-stemmed species like rubras. The netting will only be needed until the pollen has been set and until shortly after the petals have fallen off. Then the netting can be removed. This is where keen observation is handy but err on the side of caution and “bag” your flower before the petals have fully opened. How will you know? The petals will still be cupped close to the style. The photo below shows the flower fully open and at this point on this particular flower, the pollen has begun to drop onto the style. It should have been bagged sooner.
Flower Fully Open

The style is the five lobed structure that is the bottom of the flower. This contains the female parts of the flower, 5 stigma in all. On the smaller species (rubras and psittacinas), the flowers are going to be quite small and two people maybe needed to carry this out; a small artist’s paint brush maybe a better tool than a Q-tip for gathering and transferring pollen. Cut a large enough square of netting to cover the flower loosely and be tied with the string. I start at the back of the flower and tuck the fabric between the stem and the back of the sepals. The sepals are the stiff parts that are left after the petals drop. Then wrap the flower loosely and tie it off until you are ready to pollinate the flower.
Bagging Procedure


After each pollination session, secure the netting until the petals have dropped and the flower tilts upward.
Step Two: Collecting Pollen and Cross Pollination
You will need to check the flower every day to see if the pollen has developed and begun to drop onto the style from the anthers. It will look like small pale yellow particles. Pollen will drop for several days up to a week and can be gathered off the anthers if necessary. The anthers, the male parts, are in the top of the flower inside under the petals. Untie the netting and carefully unwrap the flower. Take a Q-tip and very carefully lift a petal.
Lifting Petal to Expose Flower Parts

Through the “dip” in the style, insert the Q-tip and roll it between your fingers to gather the pollen on the cotton. Withdraw it carefully. Take the Q-tip with the pollen to the flower you wish to cross (you have unwrapped this flower as well) hold the stem of the flower and touch the Q-tip to the stigma. *Remember this is protruding between the petals, and roll the Q-tip up the stigma lightly.
Transferring Pollen

Be sure to do all 5 stigmas. Each stigma has a tube in which the pollen will grow down to reach the unfertilized embryonic seeds in the ovary. Each chamber in the ovary is capable of holding 100 seeds. Re-bag each flower and repeat the process the next day for three of four times to insure fertilization takes. A sure sign you have been successful is that the petals drop and the whole flower tilts up and the ovary swells.
Successfully Fertilized Flower Pod

If you want to pollinate a plant that is not in bloom yet, pollen can be saved in the refrigerator on a Q-tip in a plastic bag or wrapped in foil for several weeks until the flower comes into bloom. To “self” a plant, simply take the pollen and apply it to the stigmas. Reportedly, Sarracenias do not “self” very well for some reason but with multiple applications of pollen you should get good seed set. I label the cross by simply wrapping a piece of masking tape on the flower stem with the name of the pollen donor (father). This may have to be replaced once before the seed ripens in the fall. When labeling the plant produced, the pollen receiver is shown first. It is not necessary to wait until the seed capsule breaks open or turns brown to collect the seeds. Seeds are usually fully ripe by mid September.
Now, ain’t plant sex grand!? Good growing!

 [Winter, 2008 – Sarracenia (purpurea ssp. purpurea x rubra ssp. jonesii) x (leucophylla x rubra ssp. gulfensis) – Anthocyanin Free Clone]
 [Sarracenia courtii, anthocyanin free x “Green Monster” – cross by Robert Co – It’s crowded! Sho ’nuff!]
 [Removed from the pot. Time to break em apart.]
 [Sorting.]
 [Strongest seedling out of this batch. Good size and shape, and root system formed.]
 [Fresh transplants… time for growth. In the coming years, their characters will be revealed.]
 [Some pretty cool windows on the back of this one..]
 [Sarracenia rubra ssp. wherryi “Chatom Giant” x “Sky Watcher”]
 [Sarracenia ‘Reptilian Rose’ x leucophylla “pale” – cross created by Dr. Travis Wyman]
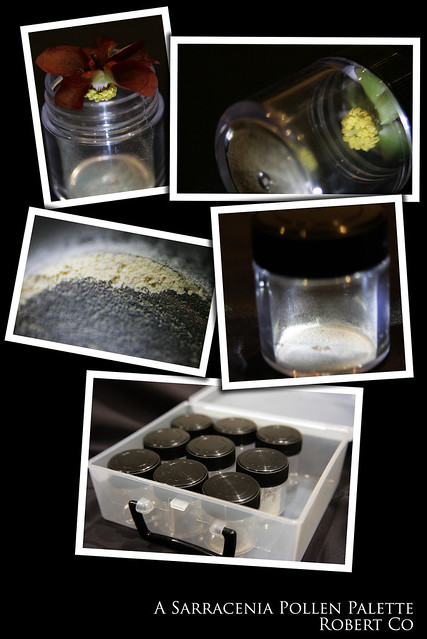 [A Sarracenia Pollen Palette. It’s nerdy. But it works.]

