Category Archives: How To

Pollination: Tools

Hope everyone is having a great weekend thus far! Let’s talk a little bit about sex today. Plant sex. Pollination! For those of you who didn’t see it in an earlier post, be sure to review Brooks Garcias pollination guide.

I love hybridizing Sarracenias. It’s this whole creative process that I find so enjoyable. See, ya got this one plant you really like, and want to combine characteristics from another plant ya really like — then you cross ’em and hope that the babies will have that combined characteristics from both parents for a bomb ass plant you’ll really jockin’.  I am even working on quite a few hybrids that will take several generations to come to fruition. Me gots these crazy plant ideas that will take several crosses to create through the years. It’s all a creative genetic gamble, but that’s something that I find so fascinating about this process.

Just for easy digestion, I’ll break this subject up in several posts, so be sure to check back now and then on updates on this topic. Today, we’ll talk about some tools used to pollinate.  For Sarracenia pollination, the goal is to get the pollen onto the stigma. Then ya hope and pray that the pollination takes successfully. The pollen can be from a different plant,  or from its own self. The latter is referred to as “selfing” a plant. Now, keep in mind that everyone has their own way they prefer to do things, and I encourage you to try things on your own. Be creative!

Here’s a few tools that are used to apply pollen to the stigmas.

Pollinate

So, here are just a few tools:
Figure A. Q-tip
Figure B. Paint brush
Figure C. Toothpick
Figure D. Earwax pick

You notice that all these tools are small enough to get into the Sarracenia flower, scoop out, carry, then apply onto the target stigmas. I’ve used all these tools and have been successful. It’s all personal preference as far as what you want to use, and again – use what you feel is most comfortable for you.

That earwax pick (Figure D) is actually the one that I favor most right now. I was at Daiso (this rad Japanese dollar-fiddy store in Daly City, CA) a couple years ago and spotted this thing as I was wandering the aisles. See Figure D-1 below.

Pollinate

Figure D-1  – Ear Pick. Dude, so when I saw this I immediately thought Sarracenia pollination. And check out the packaging:

“For cleaning cleanly and refreshingly the earhole”

HA! I love that!  So, I guess it’s not only great for cleaning cleanly and refreshingly the earhole, but it’s great for your Sarracenia hole too.  The reason I like working with the refreshingly the earhole tool is because I find it’s efficient with pollen – something I’ll write about soon in an upcoming post.

Figure E below shows yet another pollination instrument that works just fine – the finger.  Yes, finger. It’s perfectly acceptable to go finger your flower to pollinate.

Pollinate
Figure E – Finger

Ok, I’m a SF Giant’s fan (baseball team) if you probably haven’t figured out by now.  See — In baseball, there’s pitchers. With Sarracenia, there’s pitchers. Get it — *PITCHER* plant?!?  Bwahahah!  Ok, that was my corny baseball/plant joke for the day…   Uhm yeah…

Anyway, back to Sarracenia…

Using the finger works well on the plants that have the larger flowers (like Sarracenia flava, or Sarracenia leucophylla to name a couple)  because it’s easier to get the finger into the Sarracenia hole.  You then take the pollen that’s on said finger and apply to the target stigmas.

Pollinate
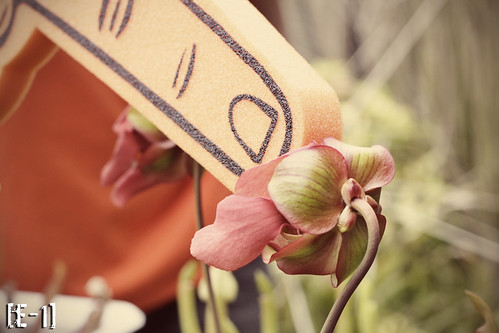
Figure E-1 – Finger pollination in the Sarracenia hole.

Pollinate
Figure E-2 – SF Giants Torture pollination.

Size does matter, and at times, you gotta just shove it in there and hope the successful pollination takes place. For those of you who are familiar with the SF Giant’s baseball “torture” way of the game, Figures E-1 and E-2 is illustrating SF Giant’s Sarracenia pollination torture.  Hey, if it works for the team, then it works for the plant. 😉

So, this concludes todays pychobabble about pollination tools and stuff. Hope this helps and inspires some of you that are looking into getting into Sarracenia breeding. Word up, dudes.

Pack It Up

Oh Yeah! Packing it up and sharing the Sarracenia love! Recently, a couple folks have asked me about how to pack/send/ship rhizomes out, so I thought I’d share a general kind of how-to on the matter.  Keep in mind, this is a very general – the main focus here is just to ensure the plant protected. There are many ways to go about doing this; just try to keep the plant safe and secure and you should be fine.

Now, the plants that I am growing outdoors are just starting to pitcher; but a few of them, such as the one below,  have not pitchered yet.  I find that this is the easiest time to ship plants as I don’t have to worry about extra packing and handling for the pitchers.  If it ever does come to that, I’ll use those triangular tube things (like they use for shipping large prints), or even cut out and create my own from other boxes I have had laying around.  Anyway, I like receiving Sarracenia in the rhizome state as I’ll let the plant send up pitchers and acclimate itself in my climate.

I start by removing the plant from the pot, and washing away the medium from the roots. I do this to save on shipping costs (weight), and I find it’s just a cleaner way to handle packing. If the plant is in active growth however, I’ll do my best to keep the core of the root ball in tact to minimize stress, then wrap and ship carefully.

Pack1
[Ready for packing.]

So now that the rhizome is cleaned up, I use a paper towel and wrap the rhizome and roots. I then dampen the towel a bit to prevent the plant from drying out during shipping and to provide a little moisture for it’s journey. Some people will use sphagnum moss, or ship with some of the potting medium on there. That’s fine too.

Pack2
[Sarracenia wrap.]

After wrapping it up with the paper towels, I’ll drop it into some sort of plastic bag.  If shipping multiple plants and placing it in the same bag, be sure to include a label or some sort of way to identify the plant so that the receiver will know what is what.

Pack3
[In the bag.]

Next, I just rolled and taped it up. You don’t really have to do this though, it’s just something I did for this shipment.  I also labeled the bag with a permanent marker to ID it. Other times I’ve included a tag with the rhizome as a form of identification. Again, do whatever works for you.  Notice the bubble wrap in the background – I’ll use that later to pack all this up in the box.

Pack4
[Taping it up.]

You may use a variety of containers to ship – typically you can get the flat rate priority boxes at the post office.  For this particular shipment, I simply re-used and re-purposed another box.  I began by opening the box up. I basically just find where the box is joined to the edge, and gently tear it off from there. (See photo below.)  This will allow me to turn the box inside out so that none of the other markings / labels from the last shipment would be visible. I don’t want to run the risk of confusing any postal employee, ya know.

Pack5
[Opening the box up. Re-using and re-purposing.]

Next, I just tape that side back to its corner using packing tape. I will also tape up the bottom, and have a clean looking box ready for re-use.

Pack6
[Taping it together.]

So, after taping it all together, I proceeded to wrap it up snug and secure with the bubble wrap I had handy. The bubble wrap that I used here was also reused from a prior shipment to me.  You can use newspaper, packing peanuts (try to the environmentally friendly kind), or anything else that can cushion the plant and keep it safe.  During times of freezing cold, others will use those 48 hour warmer things to keep the plants above freezing. I have no idea what you call em as I’ve never had to ship to an icy location… at least, not yet.  I usually just communicate with the receiving party and ship when they tell me that the temperatures are fine.

Pack7[Safe and snug.]

After it’s safe and snug, I tape it all up, slap a mailing label on it and then send it off.  Again, do whatever works for you to ensure the plants are safe and sound. Recycling materials is always great. I’ve re-used materials from the office, such as those air-pack things that are used for the toner cartridges. I’ll keep a few shipping supplies on hand as well that were used for prior shipments and just re-purpose those.  No sense in spending additional money or resources for packing, right?

Hope this little packing-up tutorial helps you to spread some of that Sarracenia cheer!  Happy shipping! 😉

Cut It Out

So, this weekend as I was checking on the plants, I found this baby. The pitcher looked good however, much more was going on than I really wanted.

Cut It Out
[Sarracenia ‘Wilkerson’s Red’ – OP]

So, my S. ‘Wilkerson’s Red’, OP (OP, by the way,  is just a shorthand for Open Pollinated as we don’t know who the pollen parent plant was) looked as if it was just fine — yeah, fine only for that one growpoint. I caught some fungus rhizome rot action going on below. This stuff is nasty and can spread, so it is important to deal with it as soon as it is noticed.  I began to notice this as I saw that some of the new pitchers that were coming up looked rather crappy and withered looking. Once I noticed it I knew I had to do some surgery.

This rhizome rot is caused by fungus, most common I believe is Botrytis.  You’ll see rhizomes turn mushy or brown and that’s stuff is just butt ugly and you do NOT want this crap in your collection.  Again, once you notice it, deal with it, ASAP as it can spread.

The below photo is a shot of the infected rhizome.

Cut It Out

Rhizome with the growpoint left is still good. Middle is crashing. The growpoint on the right is gone. This sucks, but I hope I did enough to save it in time.

I pulled this plant out ASAP from the collection.  So to deal with this problem, This is what I do:

-Separate the plant away from the rest of the collection
-Unpot
-Get rid and wash all old media off, dispose of accordingly (as it’s infected!)
-Cut away all crap rot infected areas
-Transplant the healthy stuff in fresh media and a fresh pot
-Quarantine the plant, monitor, let it grow back.

Cut It Out
[Time to do some surgery!]

So here we go. I unpot the plant by gently squeezing the pot which wil then allow me to slide the plant out.
Cut It Out

After I get the plant out of there, I *gently* took as much of the media off the roots as I could.  I then  *gently* washed the remaining media way from the root/rhizome in a bucket so that the water wouldn’t spread any infection anywhere else.  I dumped the water far away from any plant in the garden.

Cut It Out
[Getting rid of the nasty dirty media stuff]

So after getting rid of the planting media, here’s the base of the rhizome. I will keep the healthy rhizome on the left. The rest of this is pretty much gone.

Cut It Out

Next, I take sharp trimmers and carefully cut away.
*Important* It is very important to maintain good hygiene with your tools. Since I am dealing with an infected root, I made sure I cleaned that clipper. Rubbing alcohol works, or Lysol and some old rags are a few things you can use, for example. You could also let your clippers sit in an open flame for a while so that you can go brand your plants. (Just kiddin’…) but I think running the tools in an open flame should work though! (Anyone care to comment? I’d like to hear your feedback). I also hear using a 1-5 bleach solution and some old rags to wipe down the tools works as well.

Cut It Out
[Making the cut!]

After I made the cut, the infection in the rhizome was visible.  Healthy rhizome should be white, the nasty stuff is brown. The brown dead rhizome is what you want to get rid of.

Cut It Out
[NASTY!]

I cut far back into the healthy tissue to salvage the plant. Healthy tissue should look like the below.

Cut It Out
[Healthy stuff.]

And the bad stuff is below. Here’s the cross section of the infected and dead rhizome. EW! FUGLY!

Cut It Out
[Ew! It gots cooties!]

And the rhizome that I am going to salvage is small, kinda sorry looking but is my only hope right now for keeping a genetic representation of this plant.  Notice the stub-for-root on the right.  I’ve managed to save plants in worse condition that this though. I am hoping this plant pulls  through.

Cut It Out
[Hope.]

So, when rescuing the plant in this condition, I actually use long fiber sphagnum moss. The stuff below is what I pick up for a reasonable price at my local hardware store. I do NOT use that green moss, sheet moss, or forest moss that other stores carry.  Orchid moss (as it’s called on this packaging) is that blonde sphagnum moss. To me the stuff smells kinda rubbery when you first open the package.  It is typically dry when packaged up. So I grab a handful and let it soak in some water.

Cut It Out
[Da Moss!]

I then get a new pot, fill it PURE of this stuff, and then let it sit in a quarantine water tray full of water. I will make sure it’s always moist.  I plant the rhizome deep enough to make sure it’s snug , but yet not too far away from the surface of the pot.  I like this stuff because it’s light and breathable for the plant and root.  I’ve saved many a rhizome this way, and propagated plant rhizomes that break off in this way as well.

It’s important to use a new fresh pot as you don’t want your plant infected again.  If you were to use your old pot, I would suggest to sterilize it first by soaking in a 1:5 or 1:10 bleach solution.

Cut It Out
[Hope, transplanted]

I hear that some that people use at this point of slicing/transplanting would use something like a sulfur based fungicide to clean the rhizome, and to help prevent any of that fungi stuff from taking hold again.

For prevention, I have been hearing very good things about Trichoderma (beneficial fungi). I actually bought some of this beneficial fungus to fight off the nasties. I’ll only try it on some test plants to see if there’s any adverse affect, however I am being told by a couple fellow growers that the stuff works in prevention. Might was well try it… this is blog material for another post though.

I’ll continue to monitor the plant over the course of the year and watch for new growth. Sarracenia rhizomes can be tougher than what people give them credit for. Although there may not be much root on the surviving rhizome, I’m hopeful that it will survive.   I’ve even witnessed a Sarracenia growpoint that was broken off that was actually taking root in a water tray and the only thing it was growing in was some Utricularia!  (Utricularia is a genus of carnivorous plant. Some species are terrestrial, and some are aquatic.)  This broken off growpoint was growing in an aquatic mass of Utricularia…   Pretty amazing.
I’ll fill you in from time to time to keep you updated on how this baby will fare. I’m hopeful that it will send down more root and grow.

For now, all can do is watch, hope, and pray this baby gets better soon…

Cut It Out

Photos: Behind the Scenes

So, I’ve had a few people ask me about how I photograph plants. My response is pretty simple. I just press the button. 🙂 HA!

Recently, fellow garden-plant-homie-dude Derek, who is the author of the wonderful plant blog Plantgasm (twitter: @Plantgasm) suggested I do a post on my set up.  This is actually a post that I’ve been wanting to do for a couple weeks, and thanks to his encouragement, I’m putting this up.

I gotta mention – below is what works for me.  I encourage you to try, experiment, learn, and just play around to see what works best for you! I would love to also hear about your photo experiences too. I have to also tell you that I am NOT a professional photographer.  Just a dude who likes to take a lot of pictures.

THE GEAR:


So, when I shoot, I use digital SLR (SLR = Single Lens Reflex) cameras, or DSLR’s for short.  I favor shooting with these types of camera because of the control and flexibility they provide for photography. I won’t bore you about all the details here, but you can always check out the wiki and the google and read up about DLSR’s for yourself.  I started out while back just using point and shoots.  On the left is my very first DSLR camera that I still do use from time to time. It’s a Canon XTi that I’ve had for a few years.  On the right is a Canon 7d.  Now: bear in mind it’s not the camera or brand that makes the shot. It’s really about who’s behind that view finder, capturing a vision, then conveying it in the  photo.  There’s always going to be debate on which brand is best, or which gear is best.  To me, it’s not about that but rather what the final product is. Some people think the more expensive the camera, the better the photo. Well, it’s not all about the “bling” factor of your gear.  Just use what you have! 🙂


Those rings above – are actually little macro lens adapters.  This allows me to get closer to my subject.  It’s a rather inexpensive way to get a nice close up photo without spending so much on a macro lens. It comes in varying powers that attach to your lens.  The higher the number, the closer you can get to your subject. You can combine them too.  Now, if you decide to go this route, make sure that the diameter of your lens matches up with the adapters.  For example, this is my 50 mm lens that I use a lot, and the diameter is 52mm.  Often times it’s reflected as the “Ø” symbol.   Depending how close I want to get, I’ll change it up from not using an adapter at all, to combining all of them.


Here’s a photo of the nifty 50mm with the +2 adapter on.

One of the things I really love about photography with these camera’s is being able to control the depth of field, or “DOF”.  This is that “background blurred out” effect you see .  For example, in the photo above of my lens, you see how the focus is on the adapter itself and how the rest of the photo is kind of blurred out?  That’s an example of a somewhat shallow depth of field.  You can control this by adjusting your f-stop on the camera. This is the number  you see next to the “f”.  Above photo was shot at f 4.  The lower the number, the shallower the depth of field.  The larger the number, the more foreground to background you can see.  For something more comprehensive that won’t bore you like I probably am doing,  here’s a pretty straightforward video.

ON TO THE SET!

Some folks have asked about the black background in the photos. So, what do I use?  I use various things actually that are solid black – one of which, is just poster board that I painted with black chalkboard paint The chalkboard paint was leftover from a co-workers building project. He asked if I wanted it and I figured out a good use for it!


I try to use something that has a matte type finish so that it minimizes the light reflection.   I’ve used things such as the black back of clipboard, to the flat black luggage inserts.  The board in the above photo needs some retouching though. I’ll probably repaint it this weekend or something.  Others I know use things like… black velvet, black cloth, landscape fabric… Hey, whatever works!

Oh, you see white piece of paper in the shot? That’s actually my reflector!  With some shots, I’ll hold the paper just outside the shot to reflect the light back onto the subject. It brightens it up a bit.

The time of day is important too.  Shooting when lighting is even is best. Morning, dusk, or cloudy days are great times to photograph because you won’t get that strong lighting and strong contrasting shadows.   A lot of times, I’ll take my photos during these periods.

Another thing I wanted to point out in my photo above is that this was mid day with the sun high.  This gave me some issues, but I’m still able to work around it.  When the lighting is even, I don’t have a problem with the background. When the lighting is strong, I have to angle the board away from the sun so that the black side is shaded. Otherwise if it’s facing the sun, or has excess light reflecting on it, I’ll have a grayish cast in the background.  I’ll still throw a few photos up this way, but I always feel lazy when I do. Ha!  Notice in the photo that I’ve angled the board away from the sun and just left it propped up so that the black side is shaded.

Next, I take the camera, and move in on the subject and frame the shot.  I composed both of the shots of this plant below with the main focus in the upper third of the frame.  Photo composure adds some visual interest to the photos.  For example, you can read about it here.  In the photos below,  I AM holding the paper outside the shot underneath the flower and pitcher to brighten it up a bit.  The photo below of the pitcher has a really bright hood just because it was shot mid day and the noon sun was blazing on it. I would of liked to shoot it in more even lighting, but I guess for illustrative purposes, the photos will do. 🙂

THE SHOTS:


Sarracenia hybrid


Sarracenia hybrid

I hope you all liked this little look behind the scenes – now get out there, grow something, and shoot it!

Derek, thanks again for your kind encouragement and prodding to post this process!

Superbowl Superbag Packing Project

Congratulations to the Green Bay Packers for winning  Superbowl 45! Awesome game it was, indeed.  And oh, the commercials — now that was the BEST part! HA! (That Doritos one with dude sucking on the fingertips – genius…)

So, what was I up to Sarracenia wise while watching the big game? I was packing. Seeds. Getting ready for cold damp stratification! YEP!   I finally got around to my big project and truth be told, I am quite behind. See, Sarracenia seeds do need a period of damp and cold in order to break away that waxy surface of their seed shell allowing them to germinate when it’s warm and sunny again.  On a typical year, I’m able to cold stratify and germinate all within the same year, thanks to our freakish mild climate here.  However due to cube farm matters as of late, it was difficult to get to this project in time.

If I had the room, I would be doing all this outdoors in tune with the seasons – stratifying right in the pot and media in the winter so that by the time spring rolls around, they’ll be germinating.  Being that 1.) I don’t have space and 2.) I don’t have the space 3.) I don’t have the space to get all 110+ crosses from last year stratified in that particular manner, I had to somewhat compact it and used those baggies that I mentioned in my other post.

This process can be somewhat labor intensive, but in the end – given my circumstance with space, it’s worth it.


Baggies for Stratifying! Courtesy of my local Beverly’s craft store!

These bags are where the seeds will be in cold damp stratification for the next 4-6 weeks or so.  To keep the Sarracenia seeds viable, I’ve kept them in cold dry storage in the fridge.

This will be my damp stratification media. It’s actually the media I use for planting. I added a little bit of water after this photo to moisten things up a bit. It’s a mix of sand and peat.  I learned from fellow grower, (Hi Mama Lo!) that sand could help scrape that waxy coating of the seeds.

And here  you see one tool that I find quite useful for scooping the media into the bags. I figure a spork would work equally as well.

So I take about half a spoonful of media and get that damp media in there.

Repeat the above for about a hundred times over, and get something that looks like that. Bags are now ready for the seeds!

I pulled the seeds I had in dry cold storage out of the fridge. You know, the ones I referenced to in this post…  that were stored next to the bacon. I’ve gone from the Vans box to the New Balance Box. This is ‘cuz I needed new running shoes and this box was available to hold all the stratification bags. “Strat-bags.” Gawsh, that sounds so nerdy… but heck, it works for me.

The envelopes that contained the seeds are then emptied into the “Strat-Bags”


Here you can see the small Sarracenia seeds (yeah, they’re small…) in the bag with the damp sandy media.

Strat-Bag, packed full of media and seed  is then slid back into the envelope – and remember that the envelope has the cross indicated on it. Helps keep things organized.

And now, here is the completed project. I actually finished up right after the Superbowl.  I covered it with foil, since the lid wouldn’t fit anymore then place the container back into the fridge (next to bacon, of course), and just wait for a few more weeks before I’m able to sow them onto the media. Throughout the course of this cold stratification, I may just take the packets and massage them a bit (if I feel like it) to allow the sand to gently scrape up the seeds a bit.  In the meantime, I’ll clear out another grow area for these bad boys.   Honestly, I think I can fill up a small nursery with all of these seeds in there!  Ah, this Superbowl Superbag Packing Project, good times indeed!   Just next time, I hope it’s the SF 49er’s that I’ll be packing to, hah!

***

Divide and Conquer

‘Tis the season for dividing and conquering.

I’m really… REALLY behind in my dividing, but that’s fine. *Sigh* unfortunately not all of my time is dedicated to the Sarracenia. Would be pretty awesome though.  Anyway, I’m only dividing the plants that need dividing and letting the rest grow out for another season … or three.

For those unfamiliar with the dividing process, here’s a quick example of how to divide and propagate Sarracenia.

The photo below is of a multi-multi growpoint Sarracenia, about to burst into growth. (This, by the way, is a fantastic red moorei)  and it’s on the verge of busting out of the pot.  Those leaves you see are the non carnivorous winter leaves that the plant produces to photosynthesize during the darker winter months. They be called phyllodia.

I like to have a small work area when dividing/repotting. Keeps me focused on the plant I’m working on.  I also have a little tub to work in to keep the work area somewhat clean preventing too much dirt from going all over the place.

After removing from the pot, I loosen up the media a bit.  Here’s a couple shots of the rhizome/roots and what goes on beneath.


Notice the awesome root system action going on below the surface of the soil. That’s hawt.

I look/feel for a place where I can break a good sized piece of rhizome off. See figure below —  my plan of attack will be separating the rhizome at the point where the skizzors will be following the dotted line.

Now, some people do use a sharp knife, or clippers to separate the rhizome. It’s all personal preference. With a plant of this size, I can actually break off a piece by hand pretty easy.

Grab life by the rhizome. Oh, and when dividing, I do like to try to get as much root in there as I can.  However, I have had plenty of success dividing these things and planting them without any root at all (just growpoint)– and they still do survive and eventually grow roots of their own.

Freshly divided rhizomes below, ready to be potted up.

… And after potting up, I trimmed the phyllodia (you don’t really have to, but it just looks cleaner for me…) and now it’s time to just sit back and wait for the new growth to explode.

The Mix Up

Last weekend I finally had some time to mix things up.  Now, I am a believer in keeping things simple — such as my media.   I know that for whatever reason, media can be a hotly debated subject in some carni-circles. All I can say is — do whatever works for you. Seriously.

I have grown plants successfully in nothing but pure peat moss. And it’s good and great!   My FAVORITE brand is Sunshine peat moss.  Great stuff. I’ve used other brands of peat in the past and it was all effed up.  Weeds, twigs, dead bugs, dried leaves, and other schtuff was just hanging out in the moss. Oh… and one time, there was one brand where mold was a problem! Seriously! I bought a bag and there was all this fuzzy stuff growing in the bag! Nasty. So right now, I favor Sunshine. But again, use whatever work works for you. Don’t be afraid to try things out.  Just be sure it’s not that MiracleGrow brand or any other brand that has fertilizer in it.  Well… you can try it out and tell me how your plants fare.

Like I said, I’ve grown plants successfully in pure peat.  However, I needed to make the peat stretch, so added a few things.

This year, I am using sand in my mix.

Now, I don’t know if the below brand of sand is really any good, but my test plants have had no horrific results.  I picked this up from (ugh, sad to say… the Depot…) I typically like to go to the quarry and use Oly Sand, (Oly for Olympia, Washington State, I guess…) and that has worked fine for me last year.  We’ll see how the plants fare this year with this new stuff.  If they all crash and burn and die… then… I’ll blog about it, cry for a while,  and then warn you NEVER to use this brand!

Perlite.   It adds a nice airyness to the mix. The general CP go-to-catchall mix is 1 part peat to 1 part perlite.  Now, I do have to warn you NOT to breath any of this dust in. Don’t eat it either. I know some folk may be tempted.  If you use this stuff, please wear a mask. Or moisten the contents of  bag. Do not get it in your lungs, because it can cause weird things to happen to you. Seriously.   I do wear a dust mask, and also — if you moisten the contents of the bag, it really minimizes the dust from flying all over the place.

So… on to the mix.

I dump the sand in my handy dandy wheelbarrow. I then wash the sand several times over removing some sediment and residue so that it’s cleaner.

Washing sand!

Next thing, below, I dump the moist perlite. This mix is roughly 1:1:2, sand, perlite, peat.  A few more additives in there to stretch my media…

Then, I toss in the peat.  Yes, I know it’s chunky and a block of hardened stuff in the photo below. The fun part is getting in there and mixing it all up. I get in there with my garden gloves and mash it all up. The sand will actually help break it down so much faster.


… and a few minutes later, a mix ready to fill those pots.  I actually went through this wheelbarrow of media very quickly… ah, so much to do. So little time.

Another good friend of mine (Hi Mama Lo!) uses a concrete mixer to mix her media in. I should really invest in one…